
 |
| Via Elle Decor I adore a room trimmed in grosgrain ribbon and nail heads. When Traci Zeller and I first started batting around ideas for our Adamsleigh show house room, it was amazing how many of the ideas we came up with simultaneously. We were so simpatico during the entire process. Once of the details we agreed upon early on was the addition of grosgrain ribbon and nail heads to trim our gentlemen's dressing room and bath. We decided we wanted to only trim the doorways, baseboards and the ceiling. We took swift measurements and rounded up all the emerald green grosgrain we could find. We went online to find a tutorial about how to tackle this project, but there were none to be find. I did find one blogger who had attached ribbon to her nursery wall using Ailene's Original Tacky Glue, so off I went to Michael's to find this product. Every project is different you are the only one who can decide what size ribbon and nail heads look best for your product. We decided to go with ribbon that was 1" wide and 1" nailheads in french natural finish from D'Kei. I think it is fair to say you could use 5/8" and 5/8" nail heads, but probably not smaller unless you are going for that French upholstery look. |
There was only one problem with our walls....they were concrete and steel with a skim coat of plaster! Yeah, you heard me...next best thing to breaking into Alcatraz. Enter our handy, dandy installer, Mike Barclift. Little did Mike know at the time...he came to install our window treatment and was quickly named "the nail head installer" for this project once we figured out it required a drill and Traci or I have ever donned a drill. This particular project involved masonry bits and a lot of them, since they kept breaking. In regular sheetrock walls all you would need is a rubber malt. I do think drilling the holes even in regular sheetrock would make the job go faster and keep the heads of the nails heads from unnecessary dents.

As you can see from the photograph, the first thing we did glue the ribbon down
where we wanted it around the room.
where we wanted it around the room.

We used painters blue tape to hold the ribbon in place while the glue was drying.

Here is our ceiling before we added the ribbon and trim.

Here is a picture once we had added the ribbon, but not the nail heads.
Ribbon staying in place with painters tape. I need to find a pic of the finished doorway.

Finished edges

We weren't crazy about how the original wallpaper was wrapped around the corner of the rounded door frame, so we created our own and painted it to match the trim in the room which gave the illusion of trim around the door when really it was a 3" strip painted around the door way.

Next we trimmed with the ribbon and lastly the nail heads.


Did I fail to tell you that Mike had to drill a hole for each nail head and hammer
it in? Yes, he's a good man Charlie Brown!

Halfway around the room and he's still speaking to us. That's always a
good sign!

You may notice that our nail heads are further apart than what they recommend with
the scale, but we felt it was the right call for our room since our room was small and
we used 1" ribbon and 1" nail heads which are both large themselves for a small room.
we used 1" ribbon and 1" nail heads which are both large themselves for a small room.

This is a handle little tool to help with spacing your nail heads, if you are spacing them widths that work for the tool size, unfortunately ours were much wider apart.

Here is the chart with some great options. They have many more. You can
go online and see all the options. I think the one we ordered was HPM50

if you want nail heads close together, then your best bet might be to buy a chain of nail heads like the one above which only has a real nail head to be hammer every 5th
nail head. Once it is properly attached, it looks as though you hammered each one separately!
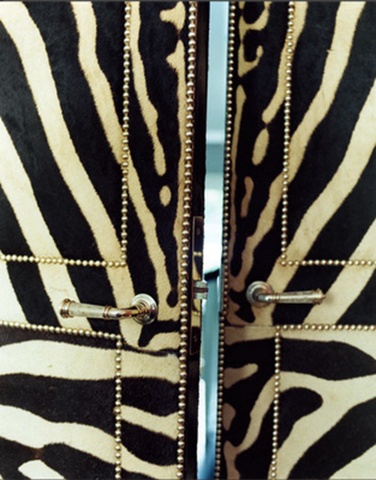
Here is a picture of an application that may have used the continual string of nail heads.
It's great for trimming out things like picture frames, cabinets, etc.

nail head. Once it is properly attached, it looks as though you hammered each one separately!
Here is a picture of an application that may have used the continual string of nail heads.
It's great for trimming out things like picture frames, cabinets, etc.

Would probably be great for doors as well, but I'm betting Miles Redd had each one of
these babies hand attached.

_________________________
Supplies Needed For Grosgrain/Nail head Trim
1 rubber mallet
Nail head spacer if the distance works for your project if not make your own like we did
with a piece of cardboard
Ailene's Original Super Tacky Glue (get a couple of these if you are doing an entire room)
Nail heads 1/2", 5/8" or 1" depending on the look you want
Ribbon - Again you can use ribbon 1/2" -1" but 1" gives you a bigger bang for your buck
Blue painter's tape to hold ribbon while drying
Sponge brush to brush the glue onto the ribbon back
Tips:
-Start on the least noticeable corner of the room and work your way around the room.
Typically that is the corner behind you when you enter a room.
-Measure your areas and cut your ribbon prior to starting, it makes it so much easier.
-Make sure you leave about 1/2'" - 1" for turning under so you have a clean edge on the ends when you finish.
-Be consistent about which ribbon goes on top when going around door frames. Start and end the same way. In other words, if you start on one side of the door with the vertical ribbon on top of the baseboard ribbon then end the same way on the other side of the door. If you don't your eye will notice it and it will look inconsistent.
-Use Petersham ribbon when possible. You will have to order online but it is more pliable and great for curved areas. It's a little more refined looking than grosgrain.
-Dont' use a hammer unless you want dented nail heads, always use a rubber mallet
____________________________
Send me a link if you decide to tackle a nail head project! I would love to see what you make. If you want you can follow my nail head board on Pinterest here!
If you live in Charlotte,NC or the surrounding area and need a good installer, Mike is the best! He hangs art, installs window treatments, nail head trim, etc. I think he can do just about anything. Email me if you want his number! lisa@lisamende.com
Have Fun!!!!
these babies hand attached.
_________________________
Supplies Needed For Grosgrain/Nail head Trim
1 rubber mallet
Nail head spacer if the distance works for your project if not make your own like we did
with a piece of cardboard
Ailene's Original Super Tacky Glue (get a couple of these if you are doing an entire room)
Nail heads 1/2", 5/8" or 1" depending on the look you want
Ribbon - Again you can use ribbon 1/2" -1" but 1" gives you a bigger bang for your buck
Blue painter's tape to hold ribbon while drying
Sponge brush to brush the glue onto the ribbon back
Tips:
-Start on the least noticeable corner of the room and work your way around the room.
Typically that is the corner behind you when you enter a room.
-Measure your areas and cut your ribbon prior to starting, it makes it so much easier.
-Make sure you leave about 1/2'" - 1" for turning under so you have a clean edge on the ends when you finish.
-Be consistent about which ribbon goes on top when going around door frames. Start and end the same way. In other words, if you start on one side of the door with the vertical ribbon on top of the baseboard ribbon then end the same way on the other side of the door. If you don't your eye will notice it and it will look inconsistent.
-Use Petersham ribbon when possible. You will have to order online but it is more pliable and great for curved areas. It's a little more refined looking than grosgrain.
-Dont' use a hammer unless you want dented nail heads, always use a rubber mallet
____________________________
Send me a link if you decide to tackle a nail head project! I would love to see what you make. If you want you can follow my nail head board on Pinterest here!
If you live in Charlotte,NC or the surrounding area and need a good installer, Mike is the best! He hangs art, installs window treatments, nail head trim, etc. I think he can do just about anything. Email me if you want his number! lisa@lisamende.com
Have Fun!!!!


This looks incredible!!! So impressed!!
ReplyDeleteThanks Girl! I appreciate you stopping by!!!!
DeleteWow, so innovative and amazingly creative! Love it!
ReplyDeleteThanks Shelley!!!
DeleteLove this look ... thanks for the tutorial!! The fake trim around the door ... perfect!!Xo
ReplyDeleteThanks Kim!
DeleteI thought they had thought of everything, this is so awesome-I've never seen it! I'm currently thinking of where I can do this in my home...love finding out new tidbits like this! Thanks Lisa:)
ReplyDeleteLaura
www.lauradrodesigns.blogspot.com
You are to kind!
DeleteYou sure hit the nail on the head with this project. I love the contrast trim~
ReplyDeleteIt adds such a great finishing touch to every doorway~
pve
haha!! You are too funny!!! Thanks my friend!
DeleteThis is wonderful! Thanks for sharing some pics of your room you created with Traci. It's fun to see when I'm too far away to get there in person. I'll be sharing this via my business Facebook page :). I think you spaced it perfectly!
ReplyDeleteThanks Tawna!
DeleteLove the look!
ReplyDeleteMust find a place for MC and I to do this, A MUST!
yes MC needs a new project i'm quite sure!
Deletei am obsessed with finding a place to do this in my own home, this turned out fabulously!
ReplyDeleteI can't wait to see what you decide. I know it will be fab!
DeleteGorgeous Lisa!
ReplyDeleteThanks Mary Leigh! I appreciate your comment!
DeleteThis looks fantastic Lisa and Traci!!!! JOb amazingly well done!
ReplyDeleteYou ladies are simply genius. It is one of my favorite details of late and you did it perfectly!
ReplyDelete